Pregnancy yoga: 7 yoga pregnancy exercises
This article advises on scientifically proven, safe and effective pregnancy yoga poses. These poses will help you feel better and support birth and recovery.
In this article, we’ve selected 15+ yoga poses, stretches and sequences to help you connect with your baby and ensure a safe and healthy pregnancy.
7 Yoga pregnancy exercises
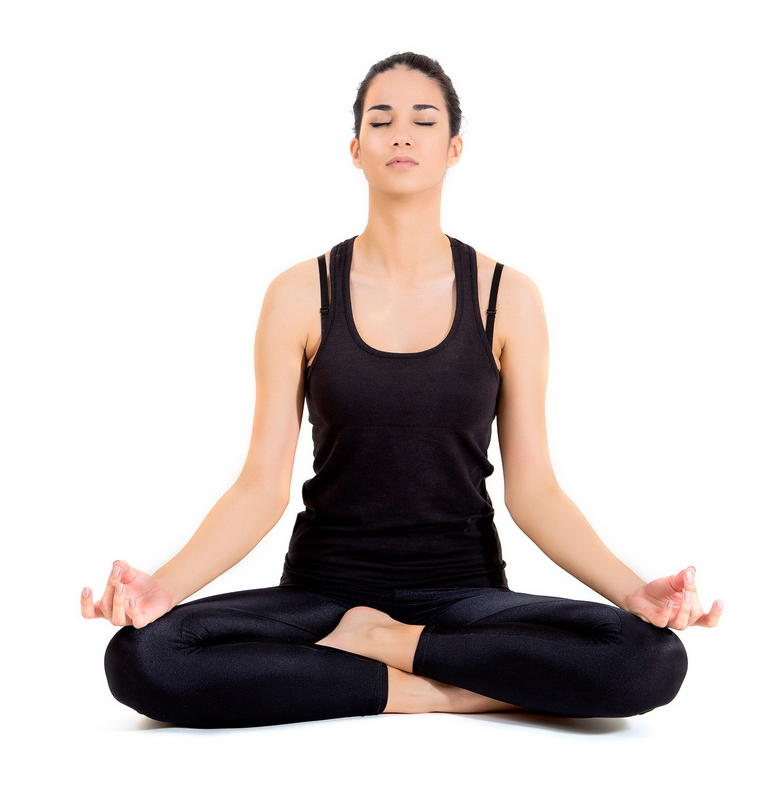
1 – Easy Pose
Advantages
This pose is a very gentle opener for the hips and also invites a feeling of lightness.
Feeling
The pose conveys a sense of peace and tranquility.
Instruction
Start in a seated position and cross your legs in the way that is most comfortable for you, either with your right or left leg in front.
Sit up straight and feel the length in your side body (waist).
Lengthen your neck and allow your shoulders to move slightly down and away from your ears, relaxing the trapezius muscles.
Variants
Easy Pose can be practiced with your back against a wall if you feel very tired. If you are in Easy Pose for an extended period of time (especially for meditation), it can feel very comfortable to sit on a blanket or two.
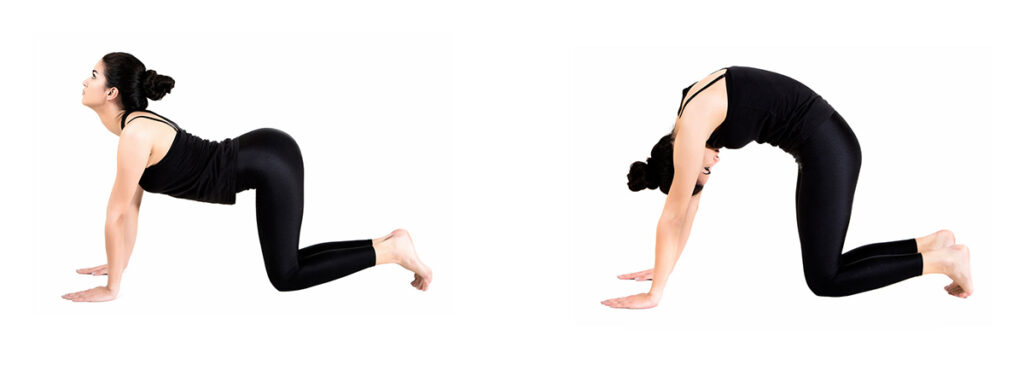
2. unicorn and rainbow pose (cow and cat)
Advantages
This pose sequence, often referred to as cat and cow, helps strengthen and maintain flexibility in the lower back and abdomen.
Feeling
This sequence is a very gentle way to warm up the core muscles. Invite the feeling of warmth from the inside out.
Instruction
Start on all fours with hands shoulder-width apart and knees hip-width apart.
Inhale and look up at the sky, lifting the sternum and coccyx (tailbone) toward the sky while gently contracting the lower back (see figure a).
Exhale and round the spine in the shape of a rainbow. Take a relaxed approach to pelvic tightening in the second and third trimesters and focus more on the curve of the upper body (see figure b).
Variants
You can use a folded blanket under your knees to cushion them. Or you can practice this sequence standing up, with your feet hip-width apart, a gentle bend in your knees, and your hands on your thighs.
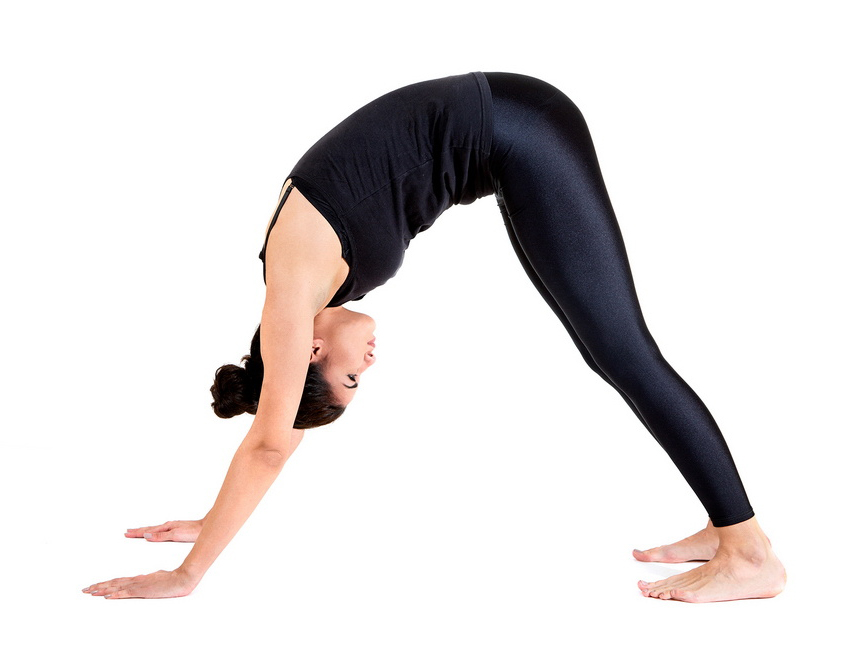
3 – Down Dog Pose (Looking down dog)
Advantages
This pose (also known as Downward-Facing Dog) is a wonderful stretch for the entire back of the body from head to toe. Down Dog is also considered an inversion because the head is below the heart and the heart is below the hip. Inversions help bring oxygenated blood to the brain and give a new perspective on the world.
Feeling
Down Dog is a gentle reversal and often feels fantastic during pregnancy. Allow yourself to connect with Mother Earth’s energy and feel it rising to support you and your baby.
Instruction
Start on all fours with hands shoulder-width apart and knees hip-width apart.
As you exhale, raise your hips to the sky with arms extended and legs straight. Note that the elbows and knees are soft and not blocked.
If you are in your second or third trimester, it can often feel much more comfortable to keep your stance wider. Just make sure you look at your toes when you look back at your feet.
Adjustments
If you have nausea, heartburn or pain in your wrist, you should skip this pose for now. Instead, enjoy stability on all fours, especially in vinyasa or flow sequences.
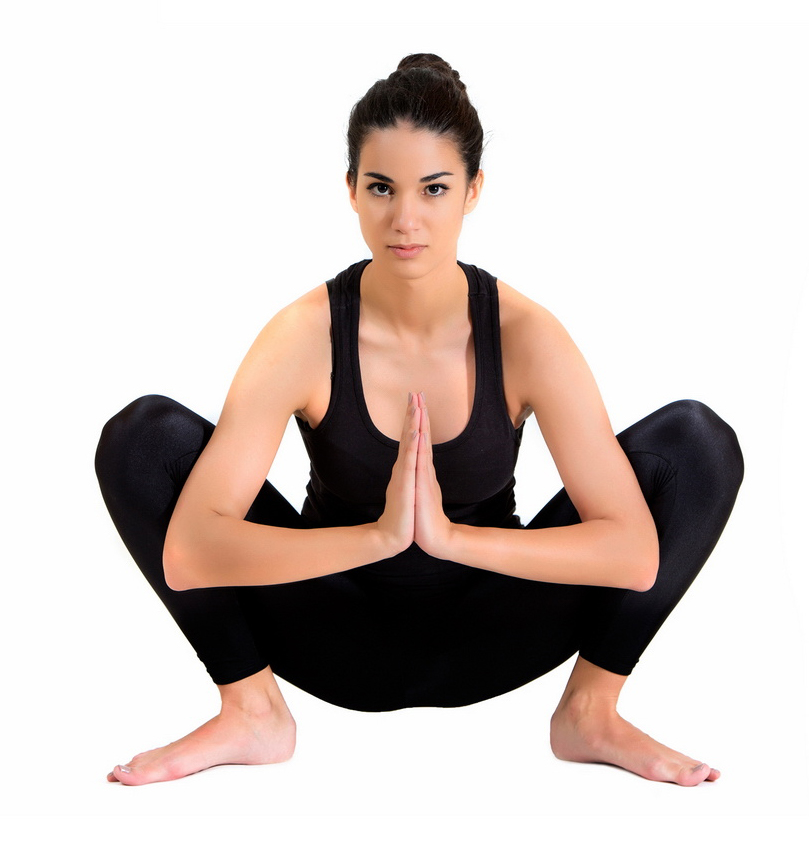
4 – Garland Pose (Garland Pose)
Effect
This pose supports the squat, which is often chosen for labor and delivery. The pose also helps to improve the mobility of the hip joints.
Feeling
The feeling is one of grounding, of connection with Mother Earth.
Instruction
Place your feet slightly wider than hip-width in Mountain Pose and turn your toes outward at a 45-degree angle, hands at your heart.
Squat down until your hips are hovering above the floor.
Variants
For support, you can place a block or several folded blankets under the ischial tuberosities (sit bones). This helps especially when the heels do not touch the floor so easily in the deep squat. This position is also great for focusing on pelvic floor strength and can be a great form for practicing Kegels and other pelvic floor exercises.
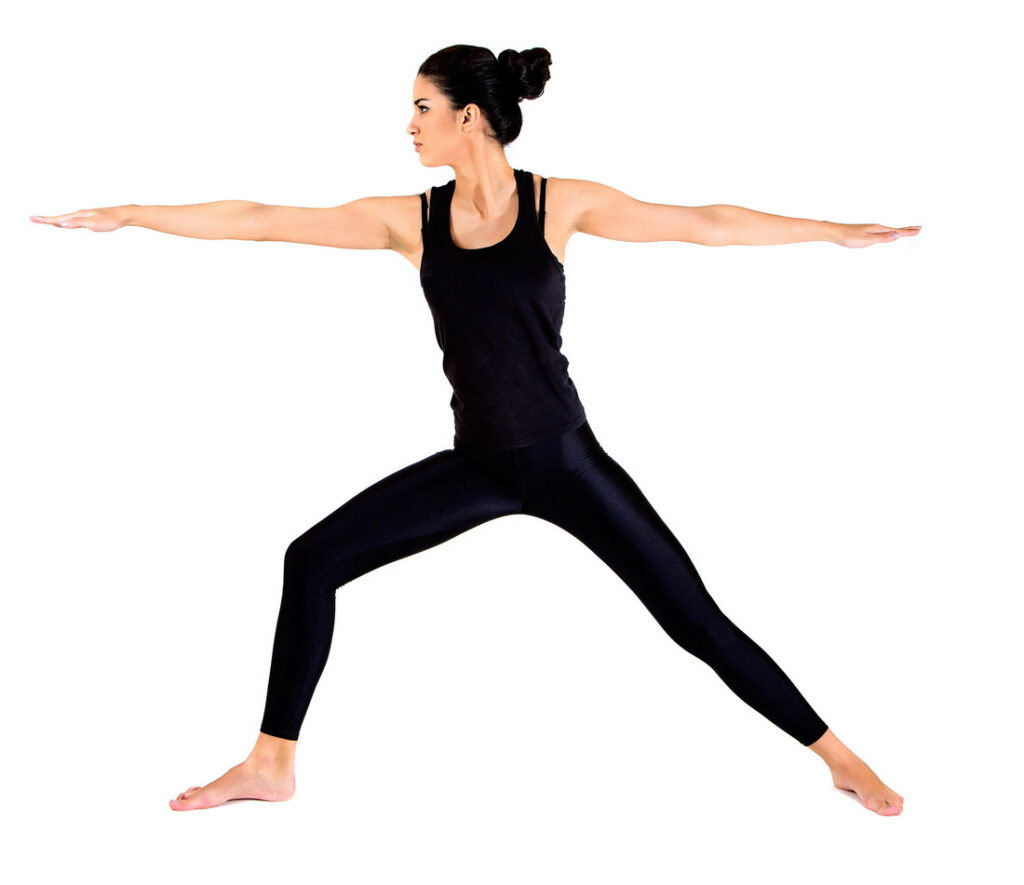
5 – Dancing Warrior
Effect
This pose helps warm up the entire body and cultivate strength in the lower body (quads, hamstrings, abductors, inner thighs) while achieving full range of motion in the upper body (flexibility training in the glenohumeral joints). The trunk stabilizers (TVA, abdomen and lower back) are also active in the sequence.
Feeling
The feeling is to stand up in Warrior 1 (or Crescent Lunge), expand your energy and power in Warrior 2, feel a sense of sublime power in Reverse Warrior, and expand your power in Extended Side Angle.
Instruction
Start in Warrior 1 or Crescent Lunge with the left leg forward (this is a matter of preference; both are strong lunges and both are correct) with the arms next to the ears.
Open to Warrior 2 as you exhale and stretch your arms out to the sides of the room. Bend the front knee and keep the back leg straight with the back foot turned slightly outward.
On an inhale, slide your left arm up and back as you bring your right hand to your hip or thigh and extend the left side of your torso into Reverse Warrior.
Exhale and reach your right arm next to your ear at an extended side angle while placing your left forearm on your front thigh or your right hand on the floor or block.
Take a moment in the goddess position before switching sides.
Repeat the sequence on the left side.
Variants
If you feel you need a little extra support under your pelvis, you can perform this sequence on a chair. The last three poses of the sequence work better on a chair than the first, so it’s best to start with Warrior 2. Stand on the seat of a folding chair and bend your right knee at a 90-degree angle, while keeping your back leg and open your arms at your sides at shoulder level. Breathe into Warrior 2 and feel the power in your arms as you extend your energy forward and backward. Flow into Reverse Warrior on the inhale and Extended Side Angle on the exhale. Take a moment in a wide plié (goddess pose) on the chair before switching sides.
6 – Goddess Pose
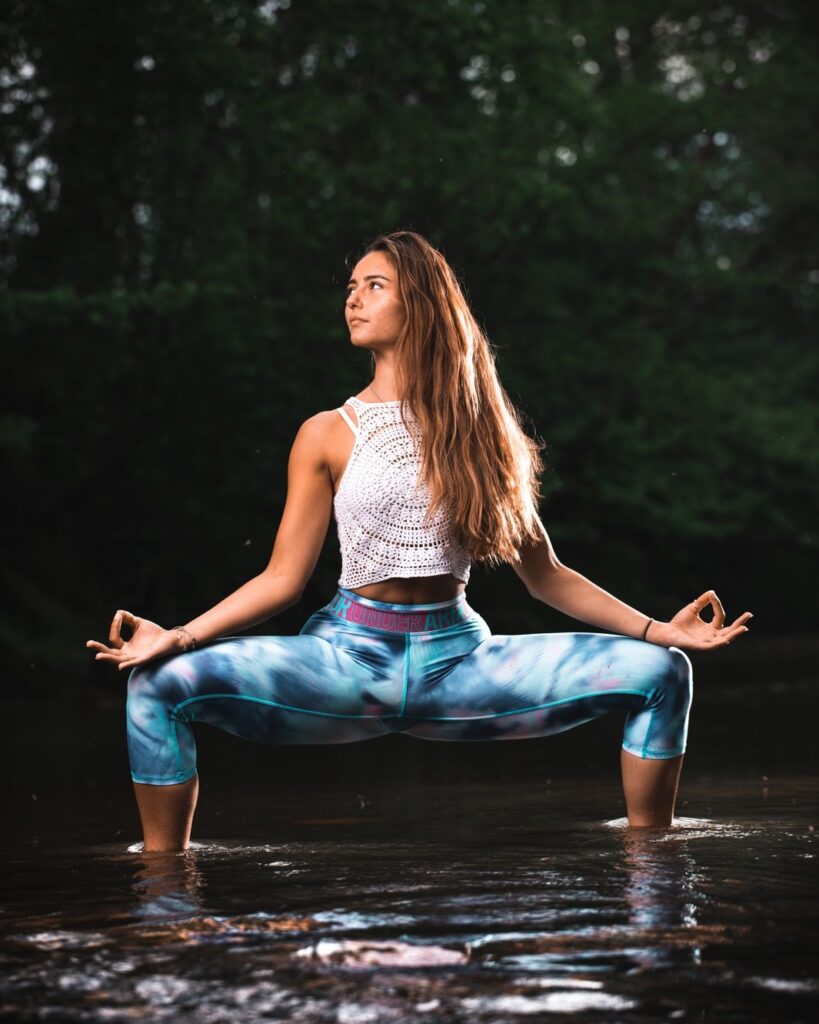
Effect
This pose strengthens the lower body with particular emphasis on the inner thigh and, like the Clock Squats, can help build strength in the core stabilizers (glutes, quadriceps, hamstrings, abductors, inner thighs, abs, lower back, obliques and TVA).
Feeling
Think of yourself as a ballerina, your strong legs carrying you up and down. The movement looks easy and beautiful from the outside and that is a direct result of the power and strength inside.
Instruction
Start standing with your feet slightly wider than your shoulders.
Rotate your hips outward so that your feet are at a 45-degree angle and your knees are pointing toward the second toe of each foot (see illustration a).
Keeping your spine upright, look forward as you inhale and bend your knees to a 90-degree angle, pointing your knees outward (see figure b).
Exhale as you push yourself to stand, emphasizing the strength in the inner thigh to help you return to standing. Your abdominal muscles will be slightly involved in the movement to provide you with additional core stabilization.
Variants
If it is difficult to keep your upper body upright, you can place your hands on the back of a chair and use it as a ballet barre. This can help you find your balance as the weight of your growing belly and breasts begin to pull your torso forward. Note that the bottom of the plié is the same, which in yoga is called the goddess pose.
7 – Standing Lateral Stretch
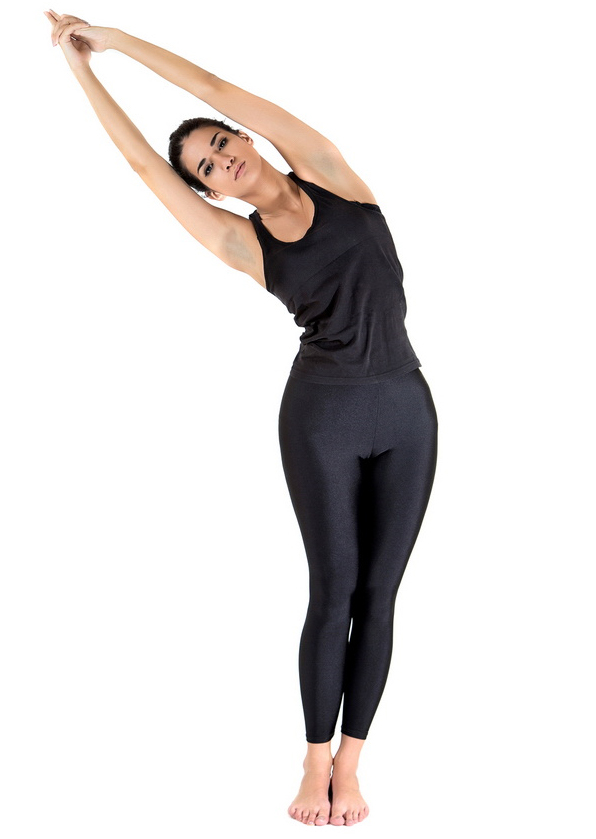
Effect
This movement stretches the lateral body (latissimus dorsi, intercostal, oblique abdominal muscles).
Feeling
Enjoy the feeling of lengthening your side body and remember that the small muscles between your ribs help you enjoy deep breathing. Imagine being able to breathe even deeper into your right lung as you bend to the left and vice versa.
Instruction
Stand with your feet hip-width apart and swing your arms above your head. Interlace your fingers and turn your palms to the sky.
Inhaling stretch through the spine and actively reach up through the arms.
As you exhale, reach to the left as if you are bending upward and over a large beach ball so that you do not buckle the side of your body (see illustration).
Enjoy three to five deep breaths on the left side and then return to the center to restore balance. Then change sides.
Variants
If you can’t bring your hands together because your shoulders are tight, you can use a yoga belt or strap. Take the strap in your hands to fill the space between your hands. Walk with your hands as close together as possible before entering the stretch.
